Today I got very small task to remove date validation. This validation appear in out of the box and did not let create functionality for previous dates. Surprisingly I did not find any validation code in form. Later I discover that at table level validation logic was written in function “validateField(FieldId _fieldIdToCheck)”.
Dynamics AX 2012
Valid Time State Tables and Date Effective Data on custom table dynamics ax 2012.
Hi all, today I have very small tip, I have inject some data on one of custom table written by some different team. But update throw exception
Update on a valid time state table is not allowed without specifying a ValidTimeStateUpdateMode
Table is custom I update the required filed by following code snippet.
Suppose table name is “Xyz”.
select forUpdate * from xyz where xyz.recid== _RecId ;
try {
ttsBegin;
_Value= “Abcd”;
xyz.Name = _Value;
xyz.validTimeStateUpdateMode(ValidTimeStateUpdate::Correction);
xyz.ValidFrom =today();
xyz.ValidTo=dateMax();
xyz.update();
ttsCommit;
}
catch
{
ttsAbort;
}
Reference https://community.dynamics.com/ax/b/axstart/archive/2014/03/02/valid-time-state-tables-and-date-effective-data-in-combination-with-dmf-and-wcf-aif
Custom Workflow from scratch, Dynamics Ax 2012

Let start work on fake requirement. Suppose we are working in HR module and client wants that worker will add their expense and send for Approval.
For this requirement, first we create a custom table and create its relation with Worker table. And then develop a custom workflow on it.
So this post contains tasks
- Table creation and relation with worker
- Create a simple entry form and list page.
- Workflow
So first we create a new table and generate its relation with Worker ID.
If we open HCMworker table we will find that its primary key is “PersonnelNumber”.
We add new enum type which has expected values, medical, Certification, Food expense and others. We use Tst as extension for our example’s artifacts.

Now create a new table set its Name as tstWorkerExpenseTable.
Expand table node and right click on relation node. Create a new and set table as HCMWorker.
Rightlick on it new => foreignKey=>Primarykey.

You will find new and new field added, you can rename it, if you check the properties you will the which will int64 bit.
Now drag and drop enum created in previous step
Rename it to Expense type.
Now add one more field name It Amount of real type and set its label as Amount
Save It. Also create a field group with overview and drag all fields in that group.
Table final structure will be as follow.

Form create simple form with Name tstWorkerExpense and set its data source as
Now create a simple form and set its datasource as TstWorkerExpense. And set data source properties “Edit” and “insert if empty” to no.
Add grid on form and drag and drop fields from data source to grid. Save it. Form structure will be look like.

Run the form you will find something like. You can improve from. It is enough for our current example
Also insert command buttons on action table for new, Edit and delete.

You can improve but for current example it is enough.
Now create a new enum for which will used as approval status for table.

Drag and drop in fields of tstWorkerExpense. Save table, compile and synchronize, so this will be reflect at SQL Server level.
Now Its time to write some code that will work for state change in workflow steps.
Right click on Method node on tstWorkerExpense and click on CanSubmitToWorkFlow

Update it as follow.
publicboolean canSubmitToWorkflow(str _workflowType = ”)
{
boolean ret;
if (this.ExpenseStatus ==tstExpenseStatus::NotSubmit)
{
ret = boolean::true;
}
else
{
ret =boolean::false;
}
return ret;
}
New add a new static method with Name “updateworkFlow” and update it as follow
publicstaticvoid updateWorkFlowState(RefRecId _id, tstExpenseStatus _status)
{
tstWorkerExpense _Expense;
selectforUpdate _Expense where _Expense.RecId ==_id;
if (_Expense !=null)
{
ttsBegin;
_Expense.ExpenseStatus = _status;
_Expense.update();
ttsCommit;
}
}
Now create a Query and This query will later used when we build Workflow type on it.

Add TstWorkerExpense table in it and set field dynamic to yes.

Now expand AOT and expand workflow right click on new Workflow Category

Set its name tstWorkFlowCategory and set Module as HumanResource.

Save it. Now add a new me display menu Item With name “tstExpenseTable” and set its form tstWorkerExpenseTable.

Now expand workflow and then expand workflow Type right click and run the wizard.

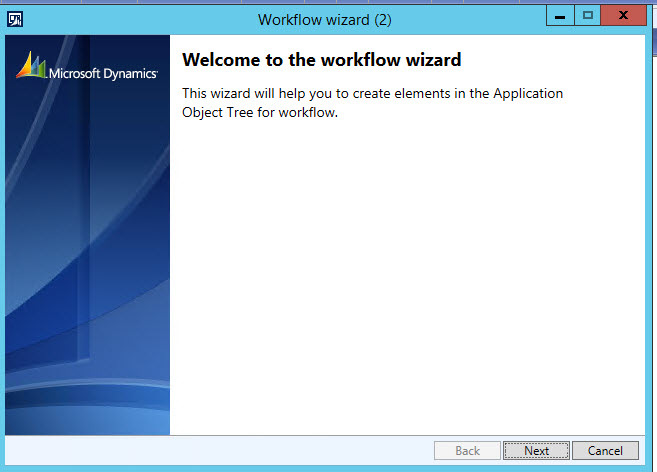
From next window set following properties all based on artifacts we create in pervious steps.

Ie. Query, workflow category and menu item. AS we test this workflow only on Ax client so check on rich client

Click on next.
In result a new Ax Project is created

- Workflow Type
- Classes
- Document class which extends WorkflowDocument.
- EventHandler class which gives implementation to handle different workflow events.
- SubmitManager class.
- Action menu items:
- SubmitMenuItem pointing to SubmitManager class.
- CancelMenuItem pointing to WorkflowCancelManager class.
Now expand the form (We created this in one above step) and expand its design, and set following properties to it will workflow enable
WorkflowEnabled =yes
WorkflowDataSorce =tstWorkFlowExpense
WorkflowType = tstWorkerEpense (We created this in previous step).
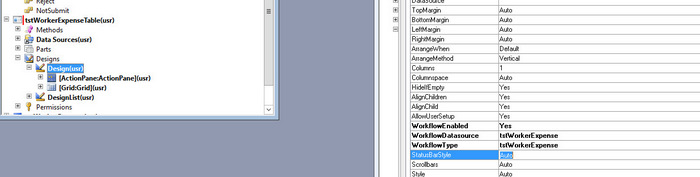
Now expand submit manager class in workflow type project and update logic as follow.
And Create a new method with following logic.
public void submit(Args _args)
{
}
Now Create a we create workflow approval.
Expand Workflow node in AOT and then again expand Workflow approval.

Now you have to use the following artifacts we created in previous steps.
Document, which we created through workflow type wizard and tables field group. And

Again new project created.

Now expand TsWorkerExpenseAppEventHandler and update following methods.
public void returned(WorkflowElementEventArgs _workflowElementEventArgs)
{
tstWorkerExpense::updateWorkFlowState(_workflowElementEventArgs.parmWorkflowContext().parmRecId(), tstExpenseStatus::ChangeRequest);
}
public void changeRequested(WorkflowElementEventArgs _workflowElementEventArgs)
{
tstWorkerExpense::updateWorkFlowState(_workflowElementEventArgs.parmWorkflowContext().parmRecId(), tstExpenseStatus::ChangeRequest);
}
public void denied(WorkflowElementEventArgs _workflowElementEventArgs)
{
tstWorkerExpense::updateWorkFlowState(_workflowElementEventArgs.parmWorkflowContext().parmRecId(), tstExpenseStatus::Reject);
}
public void completed(WorkflowElementEventArgs _workflowElementEventArgs)
{
tstWorkerExpense::updateWorkFlowState(_workflowElementEventArgs.parmWorkflowContext().parmRecId(), tstExpenseStatus::Approve);
}
public void canceled(WorkflowElementEventArgs _workflowElementEventArgs)
{
tstWorkerExpense::updateWorkFlowState(_workflowElementEventArgs.parmWorkflowContext().parmRecId(), tstExpenseStatus::Cancel);
}
public void started(WorkflowElementEventArgs _workflowElementEventArgs)
{
tstWorkerExpense::updateWorkFlowState(_workflowElementEventArgs.parmWorkflowContext().parmRecId(), tstExpenseStatus::Submit);
}
Now expand the workflow and in sub node Supported Elements, drag and drop approval artifact.

Drag

Now create a new menu item and set its form and set its following properties.

- Form WorkflowTableListPage
- EnumTypeParameter to ModuleAxapta
- EnumParameter to Basic.
Now generate increment CIL. It is necessary step.
Click on this and open the workflow design.
Navigate to the menu item to open WorkflowTableListPage to design the workflow.
Click on new button.
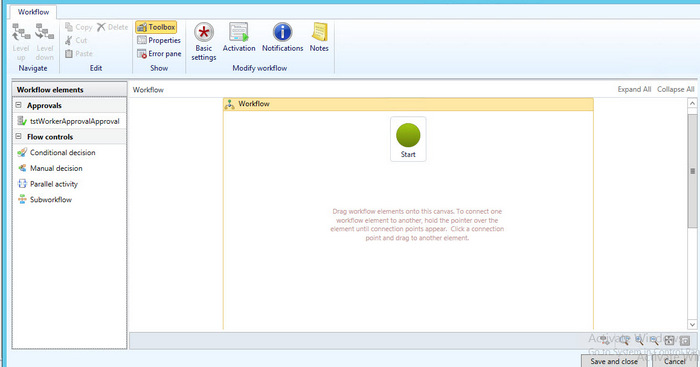
Drag and drop approval on designer screen and. Link the start to shape and from shape to end .

Current user and its employee Name and department
Today I got small requirement where I have to pick and display current log in user Name, Following code snippet helps me
static void curUserInfo(Args _arg)
{
    str sUserId;
Name  name;
str departmentName
;
;
sUserId = curUserId();
    info( "Current user ID is " + sUserId );
name= HcmWorker::find(DirPersonuser::findUserWorkerReference(sUserId)).name();
 departmentName=    HcmWorker::find(DirPersonuser::findUserWorkerReference(sUserId)).primaryDepartmentName();
info ("Name is " + name);
}
How to enable debugging on Server 2012 R3.

Usually we have to debug on server, while debugging option is not enabled. Right way to enable it from AX server configuration utility, but some Ax server configuration utility needs is on default setting and any setting on Configuration utility is un-Affordable due AOS service going to restart.
On other way is to enable debugging option through Window registry. It helps me to enable debugging on server without restart of AOS server.
Windows => run write REGEDIT
Expand HKEY_LOCAL_MACHINE => MICROSOFT

Dynamic => 6.0 =>configuration => Original (install configuration) => xppdebug

Set xppdebug to zero

reference :http://blogs.msdn.com/b/cesardelatorre/archive/2008/01/05/how-to-enable-debugging-on-server-dynamics-ax.aspx
One or more project in the solution were not loaded correctly SSRS Dynamics Ax 2012 R2.
Today I got an error when I try to edit customize SSRS report project on environment which I first time use.
“One or more project in the solution were not loaded correctly. Please see the Output Window for details”
Visual studio project opens but report did not load, Application Explore shows the message that
AOS is not connected.
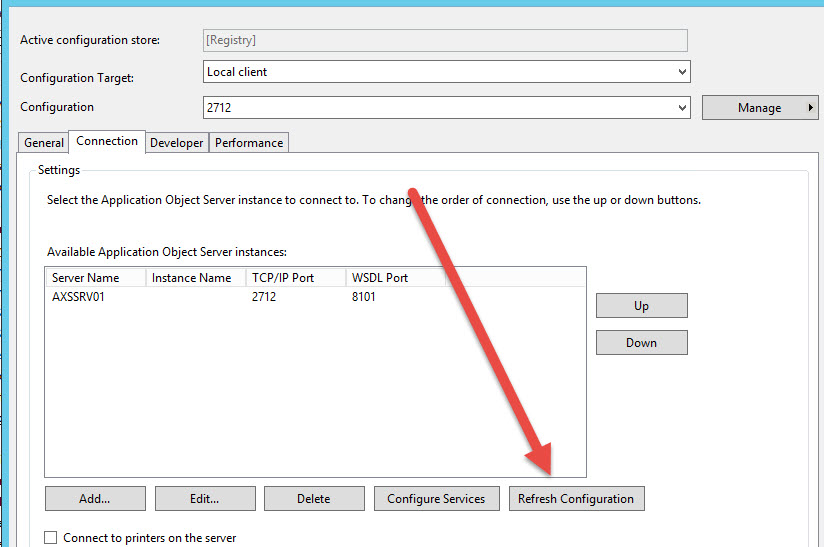
For this I open the control panel, Administrative tools and then open Microsoft Dynamics Ax 2012 Configuration

Click on Refresh Configuration.
After a few second, I edit the visual studio project, it perfectly open.
Out of box Workflow tables and relation with Document table Dynamics Ax 2012

A few days ago I got chance to work on list page which contains the lines which are assign to current user or login user for approval.
In Dynamics Ax 2012, every workflow is based on some table. Here we create Query and enable workflow on it.
When any record is submit for approval. So how the other Dynamics Ax 2012 workflow create entries in out of the box workflow tables. If we open AOT there a lot of table which is used by Workflow engine.

For current requirement we have to create custom query which is based on document table and out of the box workflow table. But problem is there too much table and how to understand relation ship between tables.
In Dynamics Ax, when no solution available then best solution is reverse engineering. Explore what Microsoft already did, try to understand it and then create your own solution.
After exploring I found that in procurement module there is “Purchase requisition assign to me” list page where the similar task is done by Microsoft itself.
This list page is based on AOT /Static Query “PurchReqTableAssignedToMe”.

On expanding I found relationship between following tables.
-Document table current example it is PurchReqTable
-SysworkFlowTable (as parent or Header table).
-SysWorkFlowTable ( as child or line table).
-WorkflowWorkItemTable.

You can explore this query in more detail and replicate this with respect to required table on your workflow based and use this query in list page.
In this form you have to set design properties to enable it for workflow. For example current PurchRequistionAssignToMe list page has following properties.

Hope this helps
Field ‘abcd’ in table ‘CompanyInfo’ has not been explicitly selected Dynamics Ax 2012 R3.
Today we face an error on our client environment that when we run the report Customer Account Statement shows error in info box as.
Stack trace: Field ‘abcd’ in table ‘CompanyInfo’ has not been explicitly selected.
Stack trace
(C)\Classes\CustAccountStatementExtController\setCommonData – line 29
(C)\Classes\CustAccountStatementExtController\runPrintMgmt – line 76
(C)\Classes\SrsPrintMgmtController\run – line 14
(C)\Classes\SysOperationController\startOperation – line 10
(C)\Classes\SrsReportRunController\startOperation – line 12
(C)\Classes\SrsPrintMgmtController\startOperation – line 14
(C)\Classes\SrsPrintMgmtFormLetterController\startOperation – line 14
(C)\Classes\CustAccountStatementExtController\main – line 6
After searching I found reply on Dynamics Ax forum by André Arnaud de Calavon where he gave the link Dick Wenning post, Hat off for them.
http://www.axstart.com/unretrieved-values-on-the-companyinfo-table-in-ax-2012r2/
Problem was in company info table value of “abcd” is null, and by unknown reason Ax did not recognize null value and show as Un retrieve. Due to this error report did not works. I found there are many other fields’ in a row are un-retrieve.
Solution open Sql server and run update query on Dynamics Ax 2012 Database ie. MSDynamicsAX or it depends on installation of Dynamics Ax 2012,
Update table CompanyInfo set “abcd”=”” where Name =”us01”.
Cheers, report run successfully.
Sale Order processing In Dynamics Ax 2012 R3 part 1

In dynamics Ax 2012, we can sale stock Item and service Item through sales orders.
We can create sales order from Sales and Marketing module or Account receivables module.
Currently I am creating and exploring Sales order on demo data contoso data and legal entity UsMF.
Open Sales and distribution module and from common menu expand sales order and click on “All Sales order” menu.

Click on it and open sales order

Now click on top Sales button

A new popup or dialog open

Select customer for against you want to enter sale Order. For example I create Sales order for Cave wholesales customer.

Now expand General fast tab. Customer Invoice Account is already selected, we can also change Currency, currently I select USD.

If we explore Order type. We find five type of sales order

We explore more, we found
Journal: If we select sales order of type Journal. There is no financial and Inventory impact of sales order. It will be draft sale order.
Subscription: We can create periodic re-occurring sales orders.
Sales Order: Sales order type will be have impact on financial and Inventory. It means, items or services are deliver to customer.
Return Order: We can register sales return, Item quantity will received back from customer and customer credit note will be generate against the sale order.
Item requirement: This type of sales order related to project requirements.
Please select Sales Order and click on ok.
From Administrator fast tab, you can also select sales order origin for example we are register sales order from phone call, mail, fax or email. Similarly I also select Sales responsible.
Click ok to Create Sales Order
It will open Sales order detail page. By default it will open Item view

Now we select Item for sales and Item configuration.

Other Item other dimension can be set like warehouse and site.

For current sales line I enter 2 percent discount amount.
Similarly we can create multiple items.

Sales from action pane click on Sell tab and click on confirm button

Posting a Sale Order confirmation will nothing more record keeping the document. It is just create a receipt for insure customer that your sale order is booked or confirm,

You can generate print and click OK to confirm it
I confirmed the sales order multiple times, you can see the confirmation history from sell action tab strip


Further sale order processing will be in next post
“Can not create a record in Audit trail (transactionLog). Dynamics Ax 2012 R3
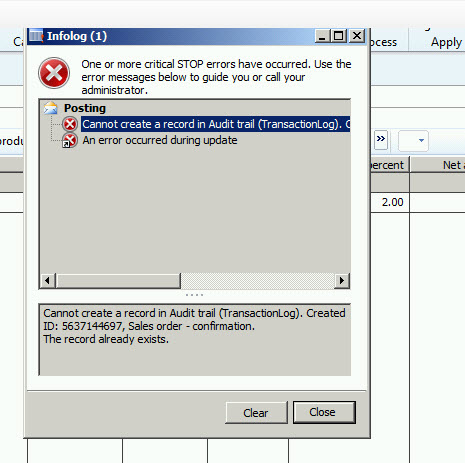
Today I face an error while confirm sales order
“Can not create a record in Audit trail (transactionLog).

While searching I found solution already posted by “PavanKumar Idupulapati” at http://pavanidupulapati.blogspot.com/
That’s work for me, with link reference I update the transactionlog table’s create method with following statement
if (appl.lastTransactionIdCreated() != appl.curTransactionId())
{
if (!TransactionLog::find(appl.curTransactionId()))
{
transactionLog.Type = _type;
transactionLog.Txt = _txt;
transactionLog.insert();
appl.lastTransactionIdCreated(transactionLog.CreatedTransactionId);
}
appl.transactionlogUpdateTTSControl().revoke();
}
References I used
http://axfaq.blogspot.com/2013/09/transaction-log-ax-2012-cannot-create.html