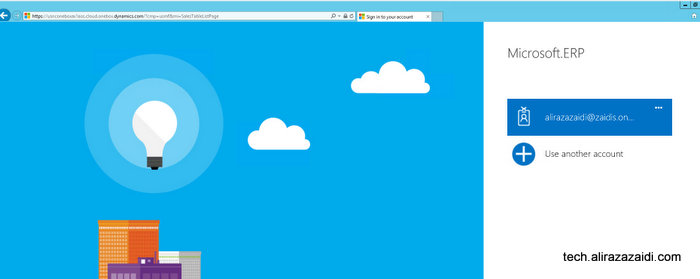
I found very interesting and interactive guided tour provided by Microsoft at Dynamics.com. I feel its worth to share.
Enjoy and say welcome to 365 degree change in the world of ERP.
A practitioner’s musings on Dynamics 365 Finance and Operations
I found very interesting and interactive guided tour provided by Microsoft at Dynamics.com. I feel its worth to share.
Enjoy and say welcome to 365 degree change in the world of ERP.
This post is series. In Last post we create some custom tables for in Dynamics Ax.
Customization in New Dynamics AX (AK 7) Part 4- Custom Tables
In basic level we create two tables EarningCodeGroup and Earning Code. In this post we build simplest and very basic level forms.
Open the project and add a new Item and select Form from “Add New Item “ Dialog and set its Name “AlEarningCodeGroup”

New form will be created in solution explore. Double click on it and open it in design mode.

Now right click on right side and select form Pattern.

From pattern select Simple list pattern.
You can read more details about simple list in the following
https://ax.help.dynamics.com/en/wiki/simple-list-form-pattern/
Patterns are applied but it described the following controls are missing.

Now again right click on designer on and add action pane, custom filter group and grid.

In first step I add the Action tab, then Add Action tab Pane page and then Button group and then add three command button.

Now update the different properties of Action Pane, tab strip and command button.
Change default to strip

Set Caption as Home
Now select first command button set its text as New and command button as New.

Similarly set other two command button as Edit, and delete.
Now again right click on design and also add group and rename it to grpFilter
Also right click on custom filter group and apply pattern We will see this in next post.

Now add Grid so form pattern requirement will be complete. Rename It to grpEarningCodeGroup. After that form design look like

Now we go back to add table as a data source. We created the AxEarningCodeGroup in previous post, we will use that table here.

Set Name it with your table name, select table and set insertIfEmpty property to no.

Now go back and expand action pane => Pane and then button group and update datasouce property to table property to AlEarningCodeGroup

Now right click on grid and press F4 or open property window and set datasource to AxEarnigCodeGroup and datagroup to grid (I created the field group with Name “Grid” In previous post”.

If you see, you find two fields are added under grid node

Now go back to solution explorer and create a new menu Item of type display

Name It as “AlEarningCodeGroupMenu” . New menu Item will be added on solution explorer. Double click on it to open it in design mode and Set Object Type to form and Object to AlFormEarningCodeGroup. Also Update its label Property to “Earning code Group”.

Open the AlEarningCodeGroup table in designer window and set its form ref to AlFormEarningCodeGroupMenu This will help us to add earning code group in earning code entry form.

Now we add the menu Item in Menu to run and display, For this open the menu Item in designer mode and drag menu item created in above step. In this post I am using custom Menu, If you are working with out of box menu then you must create menu extension then drag the menu Item in it.

Now run the application with Ctrl F5, I found the earning Code group in menu.

By Clicking on link, forms open and I did following entries.

This post is continuity of
Customization In New Dynamics Ax (AX 7) Part 1 – Creating New Model
In Dynamics New module is a Menu,
In this post we are Creating A new module In Dynamics where we add complete implementation.
So first step to create a menu Item

Double click on menu and open it in design area,

and then right click on it and update its name and label as follow

Now add new Menu item,

and Set its form properties to HCMWorker.

Now drag open again menu in Design screen and drag display menu from solution explore and save it.

Now expand the Main menu in AOT and right click on it and click on generate Extension in current project

You can see new extension in with MainMenu.Extension in solution explorer.

Double click on It and open it in designer and then right click on it to create a new menu reference


Rename reference menu and set its menu properties to Menu which we create in previous step.

Because we are doing this is post is as introduction, so we set display menu target to HCMWork set it as starting object in Visual studio project.

Now compile, and Run Project With Ctrl+F5.
You can find our custom menu is appeared in Main menu.

Suppose we need exchange rate from In Dynamics AX, For example dollar to Pakistani Rupee exchange rate.
We can do this in three steps
Create a new Currency exchange rate in new Dynamics Ax (Aka 7)
For creating new exchange rate type click on top menu and click on ledger.

From detail menu click on Exchange Rate Type

Click on new button from exchange rate types list page

Enter PkR and detail about it and click on save.


Click on General ledger from Ax menu.

When currency exchange rates page opens, it load default rate change. Select required rate exchange type.

From currency select dollar and to currency Pkr and set conversion factor to 100.

Also save and then add effective dates.

In very basic level we can divide the Sale order into following steps

Login in to Ax

On successful login dashboard page is open in web browser.
Change legal entity from top menu to USMF

We can create sales order from either Sales and marketing and Account Receivable module
Click on top menu.

Select Account Receivable menu

Or Sales and Marketing

Click on account receivable
Click on All customers

Customer list page opens. Now click on new button to open customer form.

Enter Customer account for example I Added “MVP0007” as customer account And Name as Ali Raza Zaidi, select 80 in Customer Group.

In Address just select any Zip code for current article I Select 00210.

Click on Save button, If you want to create Sales order directly click on Save and open then click on Sales Order.
Either you create new customer and then click on Save and open. Otherwise click on new Sales Order and select customer.

Select Customer selection for Sale order.

Select customer and save.
As we create very simple sale order so we select only one Item D0001 and set quantity 10 and also select change warehouse to 11.

Save the sale order

When the sales order is saved. The go to Sales Order tab => Generate=> Confirm Sales Order is enable. Click on it


Click on Ok.

You can find that status of Sales order is Open.

When Sale order is confirm. Select pick and Pack => Generate => Generate picking list.

Click on Ok.